Category: Growing tips

When my Bare Root Roses Arrive in Fall

It is truly one of my favorite things to add roses to my collection. If this were a big commercial nursery, it would be a different story. I’d want to focus on a few of the best sellers – propagate them in large, uniform crops – sell out early in the season, and spend the rest of the summer kayaking! Instead, I bog myself down with the slow process of establishing hundreds of “mother” plants – learning their individual eccentricities, and then bringing them to market a few at a time, because seriously, there’s a limited demand for specialty roses.

But I love it. This is not a business with a rose inventory attached, but rather a rose collection with a little backyard nursery to grow along with it.

So, in the video below, I take delivery of my fall order of bare root roses – 5 more that I’ve never grown before: Variegata di Bologna, Sempervirens spectabilis, Jacques Cartier, Alba suaveolens, and Kazanlik.

It caps off a year where I’ve added probably a dozen others, some from local nursery finds (‘Konigen von Danemark’ comes to mind), some ordered in spring from another bare root supplier… but my favorites of all came to me from other gardeners: ‘Souv. de la Malmaison’, ‘Narrow Water’ (thanks Elaine), ‘Etoile de Hollande’ (thanks Bob!) and ‘Maigold’ (thanks Sanjoy).

All this means that in the next few weeks, I’ll be updating my list on Helpmefind

I’ll also be posting here with a current inventory of winter carryover, ready to be claimed for spring sale (or sooner, if you’re a real die hard!).


Portable Sprinkler Project

See what I do when I have a little time on my hands? I start cementing PVC into funny shapes to move water around!

Here’s the video:

I’ll completely understand if you conclude this to be an eccentricity related to off-season idleness (actually, pretty busy winterizing roses right now, but whatever). The need for this kind of a portable stand actually arose with my employer, where we grow acres of perennials, and sometimes I just need to have one crop watered rather than scheduling a whole bed or house. Before we fashioned these portable sprinklers – which I think are rather stylish, by the way, like an Ikea chair or something – we had to lug around some rather heavy stands.

Why heavy? Well, it comes down to the water pressure coming from the impact sprinkler head. Once you install the sprinkler head onto a riser (at say 36″ high, for consistent coverage and tall crops) the pressure of the spray makes the riser sway back, and can even topple a riser with too little support. This all PVC design is great because it has a wide base, and the pipes fill with water for stability. When the job is done, unhook the hose, and when the water drains, the sprinkler is quite light and manageable.

We still have some of the old, hideous contraptions hanging around the nursery – but they never get used!

Now, I may have to do something about the color. Any suggestions?

Build a Rose Arbor with Bent Metal Tube

I would need a fast-forward button to improve my skills at garden design. I could hold the button, and the years would zoom by to show me the eventual size and scale of the trees, shrubs and perennials I’m planting. Somehow, my imagination isn’t adequate to the job. One example of this is in the cedar arbors we installed on either end of our rose garden:

Above pictured are the quite lovely roses ‘Amadis’ (a thornless pink climber) and ‘City of York’ (a thorny beast on the other side of the archway). I guess I knew that they could exceed the height of the arbor when I planted them, but without that fast forward button, I don’t think I grasped quite how out of scale the little wooden structure would look. Quite aside from the looks of it, there then came the stability problems. We tried to shore up the arbors with heavy landscape posts dug in beside them, but under the weight of the plant growth and the ongoing assault of the winds, the structure is struggling to keep standing.

So, my wish-list for replacing them:

  • larger – enough to drive our ride-on lawnmower through, and tall enough to support a 12′ climbing rose
  • stronger – dug into the ground deep enough to support itself against strong South (summer) and East (winter) winds
  • long-lasting – if I use wood, our wet climate will put it at jeopardy of rot. I don’t want to rebuild them any time soon!
  • affordable

A bit of online shopping left me no further ahead. There are plenty of metal or vinyl arbors, but they aren’t much different in size to what I have already. They would also face the same issues of anchoring them into position against our persistent winds. To buy a pair of anything nearly suitable was at the very top end of our budget – without exactly meeting our needs.

Our eventual solution was to build our own, and this video documents our efforts:

The supply list in detail:

13 x black top fence rail (10ft by 1 3/8″) approx. $26 ea. = $338

4 x galvanized top fence rail (10ft by 1 3/8″) approx. $20 ea.= $80

1x 1 liter can of black gloss paint for metal = $20

20x 2″by 5/8″ carriage bolt, nuts, & washers = $15

8x bags of quick concrete mix approx $8 each = $64

2x new drill bits = $20

Total budget: approx. $537 for both arbors

Here is the front one finished (with the old one flat down in the background):

And here’s the back one:

The total height of each arch (above ground) is around 10.5 ft. Additionally, there’s about 3.5 ft of the support posts sunk into the holes and held down with concrete.

Most everything went smoothly, and I’m pleased with the results. They actually look a little larger than I anticipated, but this time I think they’ll be in proper scale with the climbing roses, so it’s just going to take a little time until they’re grown over and blend better with the landscape.

The only difficulty I really had was with the drilling (which took a lot longer than I thought it would) and I also had to accept that there would be imperfections along the way – everything is built, cut, bent, drilled and painted by hand. There are flaws that (I hope) are only visible to me, and will, in any case, be pretty hard to spot once the roses grow over.

One last note that I would make is that the large size of my arbors really did determine the budget. If you scaled down the cross bars to 3 1/3 ft (down from 5), and reduced the height / buried portion, you could easily get the budget down below $200 per arbor.

As for the time involved, it took me about 2 weeks from start to finish – not full-time, of course, but evening hours and weekend days. The most time consuming part was the drilling (2 to 3 evenings) and painting of the arches (2 evenings). The project happily wrapped up on Christmas eve, just in time to clean my work area before having holiday guests over!


Challenging Common Rose Planting Advice

At the risk of seeming foolish, I’m going to court controversy, and attempt to debunk a piece of gardening advice so commonplace that it’s taken as gospel truth. It goes like this:

When planting a rose, dig a much larger hole than the pot size, and then amend the soil heavily before back-filling around the new plant.

I’ve seen different versions of this. Some say a hole 2 times as wide as the original pot. Some say wider. As to depth, many articles advise to dig just the depth of the pot (which makes sense to me), but others say to dig 18″ or 24″ no matter the pot size. In any case, there are any number of recommendations about how to amend the soil: bone meal, kelp meal, compost, well-rotted manure, alfalfa pellets, granular fertilizer, chelated iron, bagged potting mix, feather meal, and maybe even the kitchen sink!

I disagree with nearly all of this, and I’ll tell you why – first in this video, then in written detail below:

To recap my reasoning:

  1. The very most important thing to establishing a newly planted rose is to encourage the roots to grow outwards and downwards into the surrounding soil.
  2. The roots being firmly anchored down into the undisturbed native soil becomes really important over the winter, when the shrub is subjected to the additional weight of snow/ice and force of winter winds.
  3. The “boundary” between your improved soil and the surrounding unimproved soil becomes a barrier for roots and the natural drainage of water. Just common sense: if the soil inside your planting hole is so much richer, wouldn’t the plant favor root growth there instead of anchoring to the surrounding soil?
  4. I’ve learned it’s safer to err on the side of less fertility when establishing new plants – both here on my farm, and in my job as a grower. This isn’t a drag race… you don’t need to pump in the nitrous oxide!
  5. Back to stability: all those organic components mixed into the soil will eventually break down, leaving a pocket of less dense soil in the improved planting area.
  6. All of the soil improvement you could hope to achieve by the big hole method can be more safely and evenly applied by subsequently feeding your soil from the top down. Topdress with those organic amendments, add a mulch to the surface, and let the worms and soil life do the rest. They’re really good at the soil-improvement business!

Plus, less digging. Nuff said.

Avoid These 3 Things To Help Your Roses Survive Winter

Roses are built to survive winter

Don’t treat your roses like they’re the fancy dinnerware of the garden. Most are descended from tough, northern climate species, and they’re well prepared to get through the cold of fall and winter – at least in the mild-to-moderate climate of the Fraser Valley. Some of the “special care” that gardeners offer their roses in the lead-up to winter can, in fact, be detrimental to their survival. Don’t kill your roses with kindness! Avoid these 3 mistakes to give your roses a fair chance to survive:

#1: Late season pruning

Lock those pruners and back away from the rose… slowly. It may be tempting to give your roses a good cleanup going into the fall and winter. The leaves are yellowing and falling, the flowers are spent, and the stems are untidy – if not downright overgrown. You might think that your rose has a better chance if you cut it down lower, and send it into the winter with clean stems. You’d be wrong. Let me say this unambiguously – before winter is the wrong time to do structural pruning on a rose.

Why? Look at what winter damage on a rose looks like:

The stems are blackened at the top end – the most exposed tissue to the cold and drying winds of winter. The length of cane damaged will depend on the hardiness of the rose (many varieties have some sub-tropical genes bred in to promote reblooming) and the severity of the winter. In a mild winter, it may be only a couple of inches – in a severe winter, I’ve seen the damage exceed 18 inches!

Now I ask you: if you left your rose unpruned at 3 to 4 feet of height, and you lost 18 inches of stem in a severe winter, how would you feel about it? Not bad, probably. You were going to prune for shape and structure in the spring anyhow. Now how about if you pruned it back low  before winter – say to 18″ from the ground? If the winter damage reaches all the way back to the crown, it’s game over.

As an added advantage to leaving your rose a little untidy over the winter, birds and other wildlife depend on the rose hips and canes for food and protection.

I will add an exception now, just for completeness: there’s no bad time to remove dead or diseased wood from the rose. Also, if there are a few stems that have grown well above any support, and you know that they’ll just blow around and break in the wind, go ahead and prune them back to a reasonable length.

#2: Late season fertilizing

This one is a little counter-intuitive. It seems like a good idea to supply your plants with all the nutrition they need before the harshness of winter. A late-summer or fall application of fertilizer, however, can send your rose the wrong signal.

Those sub-tropical semi-evergreen rose genes I mentioned in passing come back into play here. Some of the best reblooming roses have a tendency to push new growth late in the season. They’re opportunistic growers. If the weather suits them, they’ll keep growing. As of today, November 19th, I still see a dozen or so roses in my garden cheerily flowering and sending up new growth.

In addition to mild weather, they’ll also grow in response to ample feeding and to heavy pruning.

That soft growth has no chance of hardening-off before winter. By far, you’re better off leaving the fertilizer until spring. Here on the rose farm, I stop feeding my outdoor roses in August.

#3: Deep Winter Mulch

The practice of hilling soil or mulch over the crown of a rose is a carryover from advice given to gardeners in very cold winter regions when trying to overwinter roses that are not well suited for their climate. It doesn’t apply well here, and from what I’ve read, it should be applied with caution even in colder climates. Read this article from the University of Illinois Extension for a good description of these methods. The emphasis is on not trapping moisture at the crown of the rose.

I don’t winter mulch anything. We take -10 celsius with heavy outflow winds, and my losses have been minimal. I’m crossing fingers and knocking wood as I write this, but I’m also quite sure that in our wet climate, anything that could hold water against the crown of my roses is not worth the risk.


For those who are more visual learners, here’s a video I made on the topics discussed above:

Trading Roses & Cuttings

Recently, I’ve been talking to anyone who will listen about why we (rose gardeners) need to take control of our own hobby and safeguard the many garden-worthy, heirloom and unique roses that are no longer offered “in the trade”. Think about this for a minute: we have over 2000 years of rose cultivation under our belts, and thousands of exceptional cultivars selected. Yet, we’re going to leave it to some buyer at a national home improvement store, sales report in hand, to decide which ones will carry on and be offered to the next generation of gardeners. Can you say “Knock-Out”?

Madame Hardy, pictured above, will probably never make the cut at the big-box stores – but still deserves an honored place in the garden. Thus, we need a plan.

If you look back on my previous posts, or at my Youtube videos, you’ll see me giving instruction on how to take semi-hardwood cuttings. I’ll probably add another one shortly on how you can stick winter-season hardwood cuttings. I also talked to the Fraser Pacific and Vancouver Rose Societies about how we can work together to keep our best garden roses being propagated and distributed to budding gardeners.

If we’re not going to rely on the big nurseries, just how do we expect it to happen? 

And just how do you eat an elephant? One bite at a time. How do we save garden-worthy roses? One rose at a time.

This is my first offer: If you have a rare but worthwhile rose in your garden, and are willing to root some cuttings, I’ll be happy to trade you something interesting from my assortment. I’ll plant your rooted rose as a trial plant in my garden, and if I also find it worthwhile, I’ll continue to propagate it for sale. And that’s that… one more rose back “in the trade”, insofar as you can call our little farm part of the nursery trade.

And my other offer: Maybe you don’t have the time or wherewithal to root your roses, or maybe you’re too far away from the Fraser Valley to make sense of trading potted roses. Nonetheless, if you have a rare rose in your garden, and you’d like to see it back in distribution, you could send me some cuttings. I’ll happily pay the postage. On my end, I’ll stick the cuttings and see if I can get some roses rooted. In return for your efforts, upon successful rooting, I’ll send you your choice of some rooted rose liners.

So that’s my part in it… but I’m just one guy. The more gardeners we get involved in preserving roses, the better we can help each other to take control of our hobby. That’s why I’m asking you to arrange your trades of cuttings or roses on this Facebook group: Canada Rose Cuttings & Exchange.

We can share our lists: what we have, what we’re looking for. But we can also share techniques, arrange trades, discuss suppliers… anything related to the propagation and dissemination of hard-to-find roses. I hope to catch up with you there.


Plant These to Support Beneficial Insects

Plant These to Support Beneficial Insects

You’re not freaked out by “bugs” in the garden – because you know a balanced population of insects is the secret to a healthy garden.

There are all sorts of plants you can include in your garden to support the health of bees, butterflies, and other garden helpers. In general, any increase in plant diversity is helpful – but I’ve prepared a list of plants that can “fill the gaps” in feeding and supporting the beneficials. To round-out your insect-friendly garden plan, choose some from each of these 6 groups:

1) The early-season heroes, like Candytuft

Late winter and early spring can be tough times for your garden helpers. Gardeners who provide early-season blooming flowers give the good guys a head-start against the inevitable population explosion of garden pests. Candytuft (Iberis umbellata, the annual type, is pictured above) is a member of the mustard family, which also include such early-season flowers as wallflowers (Erysimum), Rock cress (Aubrieta), and Basket-of-gold (Alyssum). Supplement your early season bloomers with some of these:

  • Siberian bugloss (Brunnera)
  • Lungwort (Pulmonaria)
  • Species roses (Rosa hugonis or Rosa spinosissima, for example)
  • Creeping phlox
  • Lenten rose (Helleborus)
  • Pigsqueak (Bergenia) and yes, I just like to say “Pigsqueak”

2) Wide-open flowers for bees, like Echinacea

Hard-working and adaptable as they are, there are some flowers that bees can’t feed on because they have too many petals or a difficult bloom form. To support these pollinators, look for wide-open and easy to access flowers, like the ones on this list:

  • Shasta daisies (Leucanthemum)
  • Single-flowering roses like ‘Darlow’s Enigma’ or ‘Ballerina’
  • Borage
  • Joe-pye weed (Eupatorium)
  • Lenten rose (Helleborus)
  • Pincushion flower (Scabiosa)

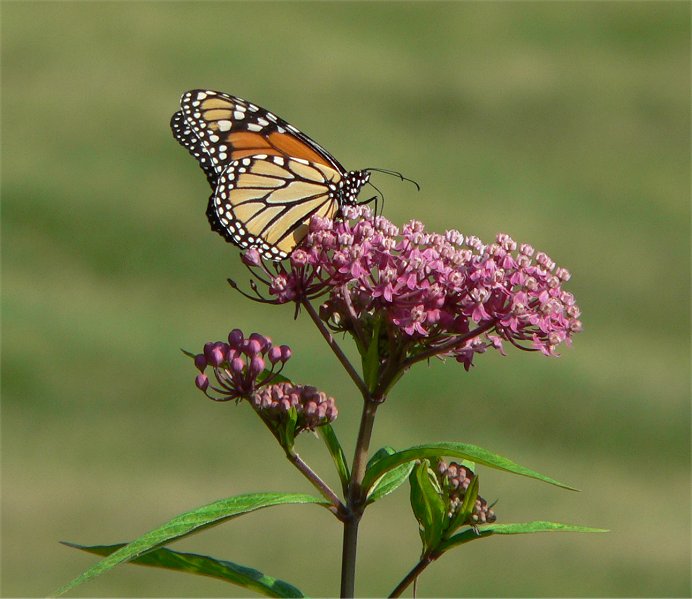
3. High-nectar plants for butterflies, like milkweed

Butterflies can feed on many of the flowers that bees are attracted to, so if you’re already planning on some bee-supporting flowers, you’re well on your way to helping butterflies too. In addition to the ones listed above, butterflies look for nectar in plants with tubular flowers, like garden sage (Salvia). Here are some other plants that butterflies frequent:

  • Butterfly bush (Buddliea)
  • Goldenrod (Solidago)
  • Gayfeather (Liatris)
  • Root-beer plant (Agastache)
  • False-indigo (Baptisia)
  • Verbena

4) Tiny flowers for tiny insects, like Queen Anne’s Lace

Don’t forget about the little guys – the little Aphidius wasp and hoverflies that do so much to control aphids are particularly attracted the tiny flowers of members of the carrot family – but other plant from different families are equally useful. Some of the easiest and most attractive garden plants are in this group:

  • Yarrow (Achillea)
  • Fennel (Foeniculum)
  • Lobelia
  • Poached-egg plant (Limnanthes)
  • Statice (Limonium)
  • Sweet cicely (Myrrhis)

5) The designated victims, like nasturtium

The idea behind a “trap crop” is to give early pest outbreaks a place to happen in your garden – on your terms – on a plant that you’ve grown for that purpose. My roses are never the first place I notice aphids. They appear on my nasturtiums and lupins first. This gives their natural enemies a chance to build up their population and bring things into balance before the outbreak reaches my favored plants. In this way, the trap crops also become banker plants for beneficial insects. Other plants often planted as trap crops are:

  • Beans (for spider mites, aphids and thrips)
  • Eggplant (for whitefly)
  • Lupins (for aphids)
  • Shasta daisy (for thrips)
  • Dill (for aphids)

6) Winter insect habitat, like hedging cedar

Believe it or not, even the common hedging cedar can play an important role in balancing insect populations. Researchers found that conifers like spruce and cedar maintain high levels of predatory mites through the winter. Even dormant plants can be a safe haven for overwintering beneficials, so don’t be so quick to tidy up and cut down your perennials. Here are some other overwintering havens you can provide:

  • Evergreen viburnum or other broadleaf evergreens
  • Tall wild grass or ornamental grasses (unpruned)
  • A wood pile or stump or other fallen branches
  • Roses with hips left on
  • Fallen leaves (left in place in the garden)

Make small improvements, and then fill the gaps…

It’s tempting, but maybe unrealistic, to make a planting plan that covers all these functions for the entire year – and gets it right the first time. My suggestion is to start with some multi-function plants – like Joe-pye weed or yarrow – and then observe to see what’s still missing. Is there a time your garden lacks flowers? Where and when are the pest outbreaks happening? With these observations, you can add plants to fill the gaps for upcoming years.

Do-it-yourself Heated Propagation Bench

It’s a good thing that my hobby is neatly divided into seasons. It gives me time to forget how foolish I was to buy and save all those seeds last year, and how hard pressed I was to find warm places to germinate them. My wife Lisa (who I may have mentioned having the patience of a saint) tolerated it when my seedling trays migrated into the house, but drew the line after all the appropriate windowsills and nearby table tops reached capacity.

At some point those early-season seedling trays need to migrate out the greenhouse – not only for the sake of my marriage, but also because the plants benefit from the better lighting conditions of the greenhouses. I won’t confess here which was my greater motivation.

The difficulty: at the time when I’m starting many of my seeds (February, March) weather conditions can still be quite variable, and if I put newly sprouted seedlings out on an unheated bench, a bitterly cold night could knock them right down.

All of this explanation is by way of justifying another heated greenhouse bench. Here’s the video of us building it:

I won’t spend a lot of time recapping what I already said in the video, but I will say this: root heating has an incredibly beneficial effect of young plants. It increases root development in those vital early weeks, which in turn means a quicker, healthier plant. The nursery I work for uses a much larger an more robust boiler system with microtubes to distribute heated water to all the benches – and the results are phenomenal: big healthy plugs that are ready to transplant and finish in a larger pot within weeks.

I can’t duplicate that entirely, but I do get good results on these inexpensive benches. Because of the insulation, and because all the heat is released relatively close to the roots, they actually don’t take much electricity to get a good result. Later in the season, I use the same benches for rooting my semi-hardwood rose cuttings.

Overwintering perennials

Even if you only know me casually, you’ve probably caught on that I’m a bit of a plant geek… I mean, more than just the roses, tomatoes and squash. In fact, my real expertise (at my day job) is regarding perennials. I’ve learned a lot there about how to grow each crop to finish for sales in the spring, but the trickiest growing is on those crops I have to tend through the winter.

I made a quick video about it:

https://youtu.be/Obbp0BV7TeE

When it really comes down to it, the tricks to successfully overwintering any hardy plant in a container are pretty similar:

  • Start with clean plants – remove dead and diseased foliage early to avoid later problems
  • Protect them from cold winds that would dry their tissues
  • Shelter from the coldest temperatures. For some of the less hardy plants, this may mean heating – but for many perennials in the mild winter climate of the Fraser Valley, this just means a layer of protection (snow, crop cover, or an unheated greenhouse)
  • Try not to let your greenhouse heat up during sunny days
  • Provide decent air circulation
  • Don’t keep the plants wet all the time, but do water ahead of the coldest weather to prevent desiccation
  • Even if you start with clean plants, do inspect them frequently for any signs of disease or rot. As foliage dies down, in most cases, it’s advantageous to trim it away from the plant

And because this is a website about roses, I’ll add this: while I don’t recommend much winter pruning for roses in the landscape, I perform a moderate pruning on the container roses in my greenhouses. Where they have a little protection, they tolerate the winter pruning fairly well – I combine the pruning with stripping off the old foliage. This sanitation protects from winter rot, but also gives new foliage in the spring a fresh start, with no old leaves to carry over black spot or powdery mildew.

And here I am, enjoying a sunny January day in our garden! The days have been getting longer since December 21 – but I recently heard a climatologist quote a different measure: the dead of winter, which sounds more ominous than the way he explained it. The dead of winter, measured by local weather history, is the point in the year when your area has the very lowest average temperature. Every day after that is statistically more likely to be warm. I can buy into that! Here in the Fraser Valley, it’s around January 4th.

So we’re over the hump. As a rule of thumb for me, I begin seeing my greenhouse plants wake up around Valentine’s day. There’s still a lot of winter that can happen in a month, but it’s nice to have the finish line in sight.