What does it take to become a rose hybridizer? As it turns out, mostly patience! While top-tier rose breeders bring a wealth of knowledge and a keen eye for quality, the basic techniques aren’t difficult to understand. Once you know the steps, it’s just a matter of repeating the process until you create the rose you’ve always imagined—or maybe one you never expected! However, be prepared: evaluating each attempt can take years. So, patience really is the key.
Anatomy of a Flower: The Basics You Need to Know
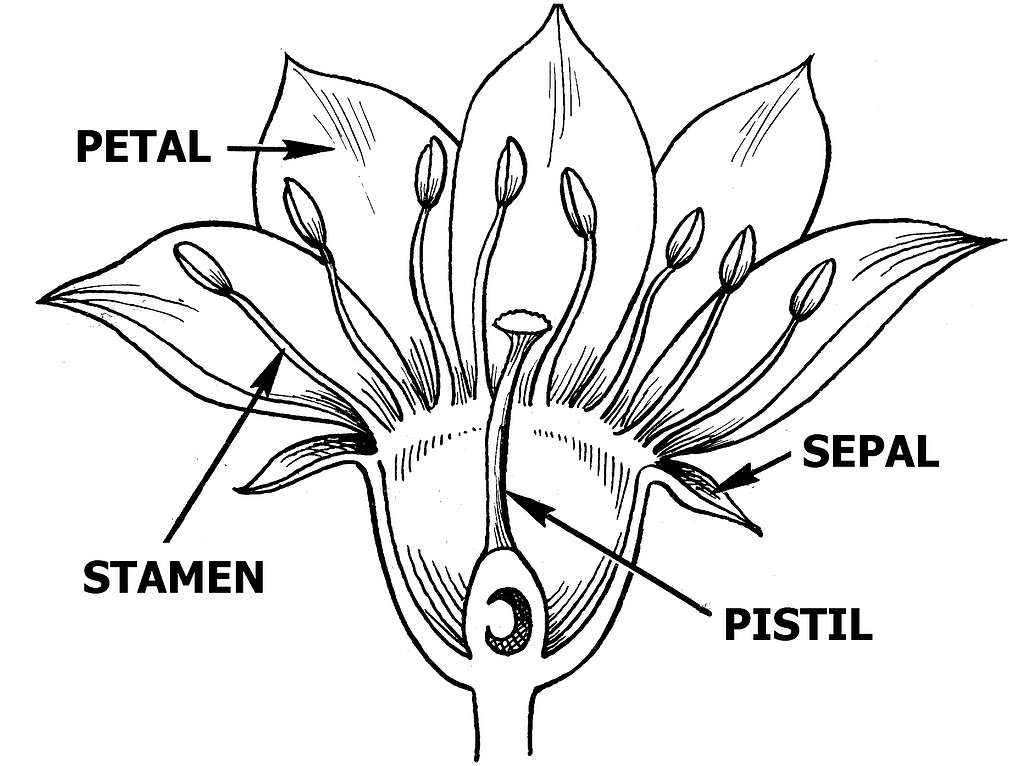
To start hybridizing roses, it’s important to understand basic flower anatomy—think of it as the “birds and bees” of roses. In simple terms:
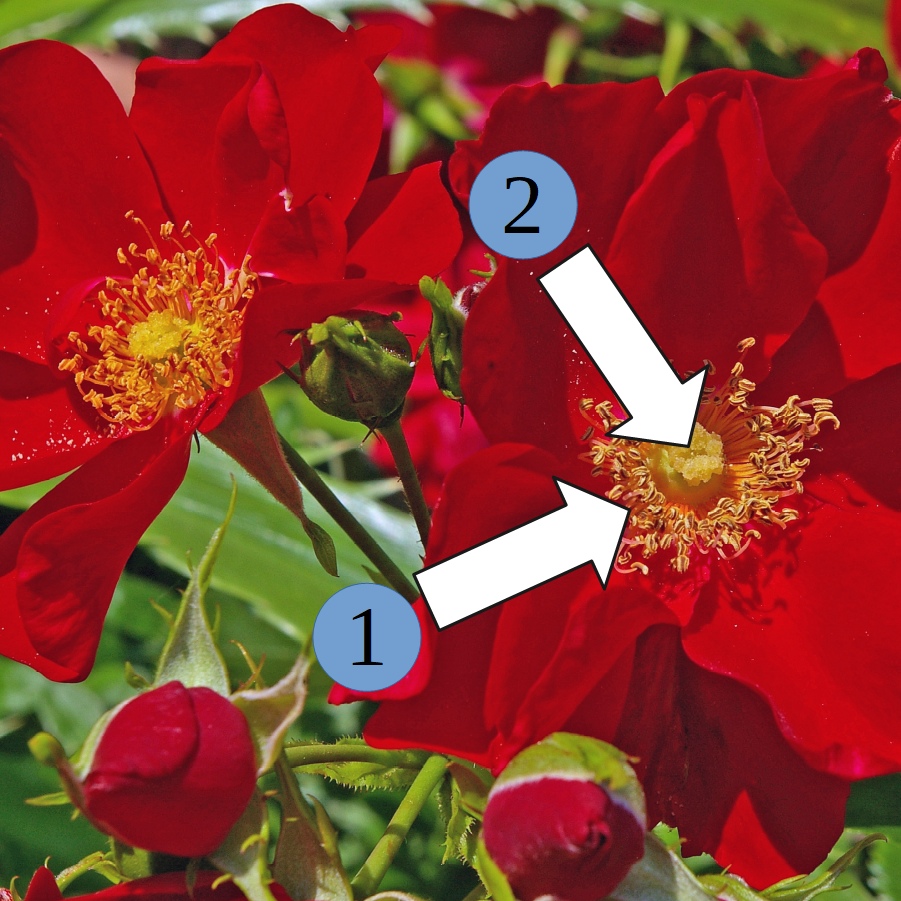
- The stamens are the male parts that produce pollen.
- The pistil is the central female part, which develops seeds when fertilized.
Your goal is to collect pollen from a selected “father” rose (pollen parent) and transfer it to a chosen “mother” rose (seed parent). To succeed, you’ll need to prevent bees or other insects from accidentally pollinating the flower before you do.
Take a look at the following diagram to identify these parts clearly.
Step 1: Collect Flowers from Your Pollen Parent
Timing: Morning of Day 1
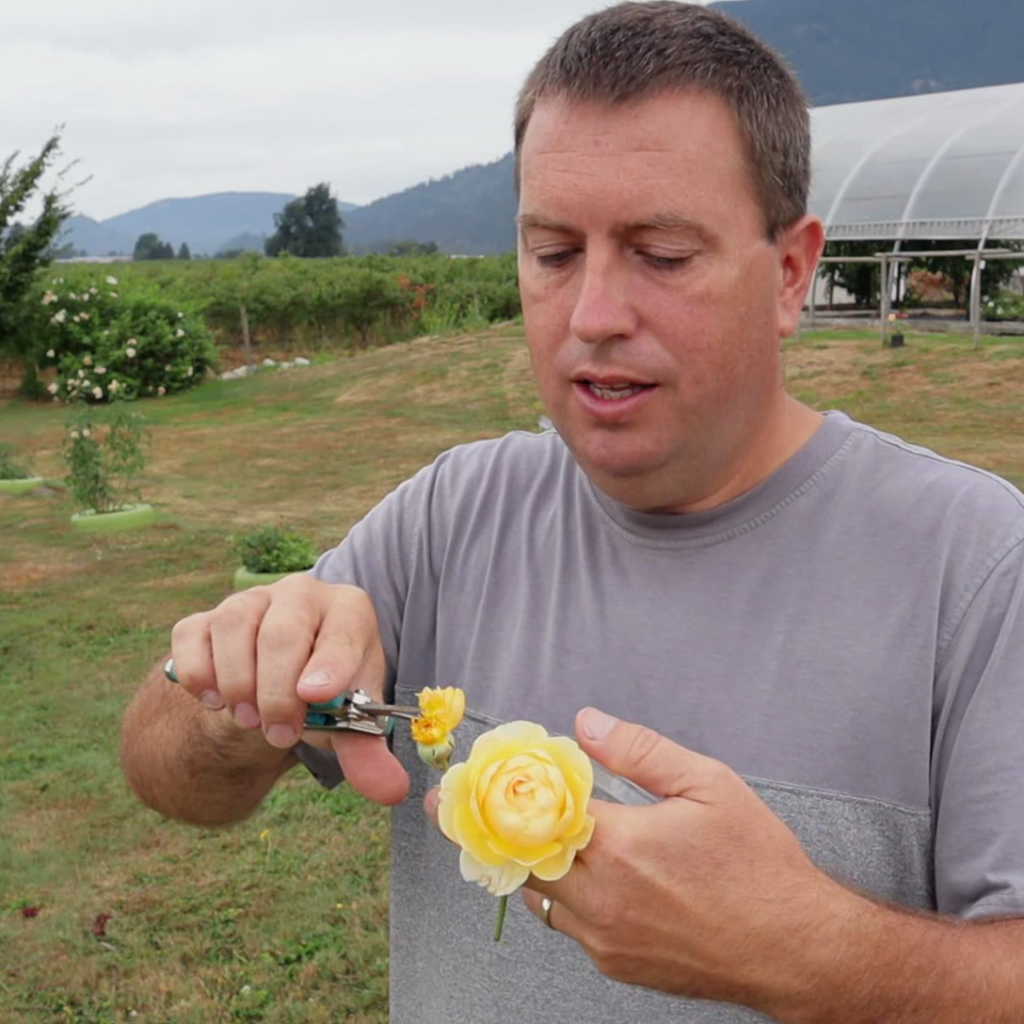
Choose flowers from your pollen parent that are almost open. The petals will still be closed around the stamen but loose enough to gently peel back. Here’s what to do:
- Cut the flowers: Trim them off the plant entirely since you’ll only need the pollen.
- Remove the petals: Snip them off to expose the stamens.
- Prepare for pollen collection: You can either remove the small sacs (called anthers) or keep them attached and use the whole flower as a “brush” for later.
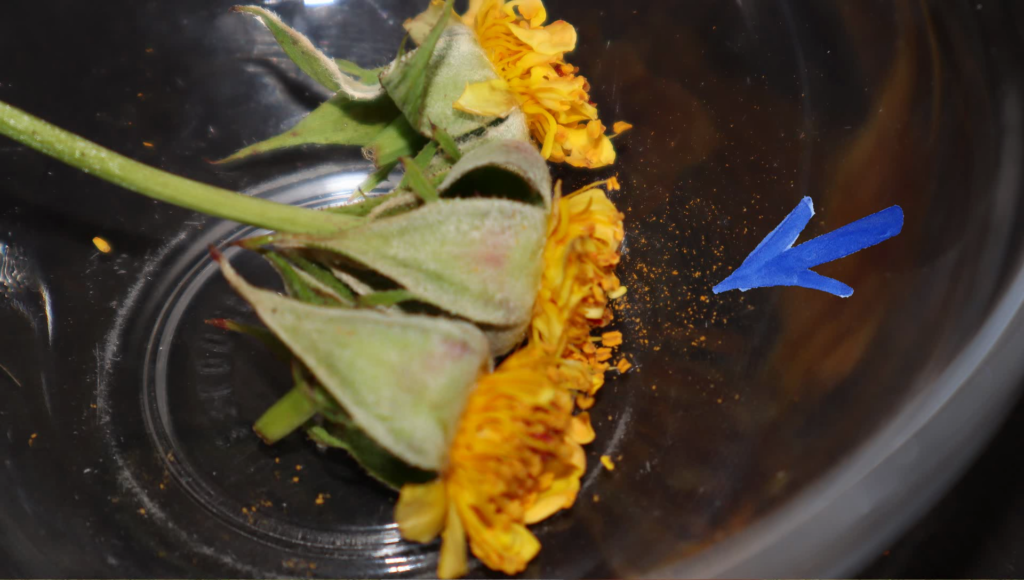
Place the prepared flowers in a small container. Pollen may not release immediately but should start within a few hours. A warm, dry location can speed up the process. Pollen tends to remain viable for 24–48 hours, so aim to use it during this time for the best results.
Step 2: Prepare Your Seed Parent
Timing: Morning of Day 1
The seed parent, or mother rose, will stay on the plant because it needs to develop seeds. Follow these steps:
- Select closed flowers: Choose blooms where the petals are still closed but loose.
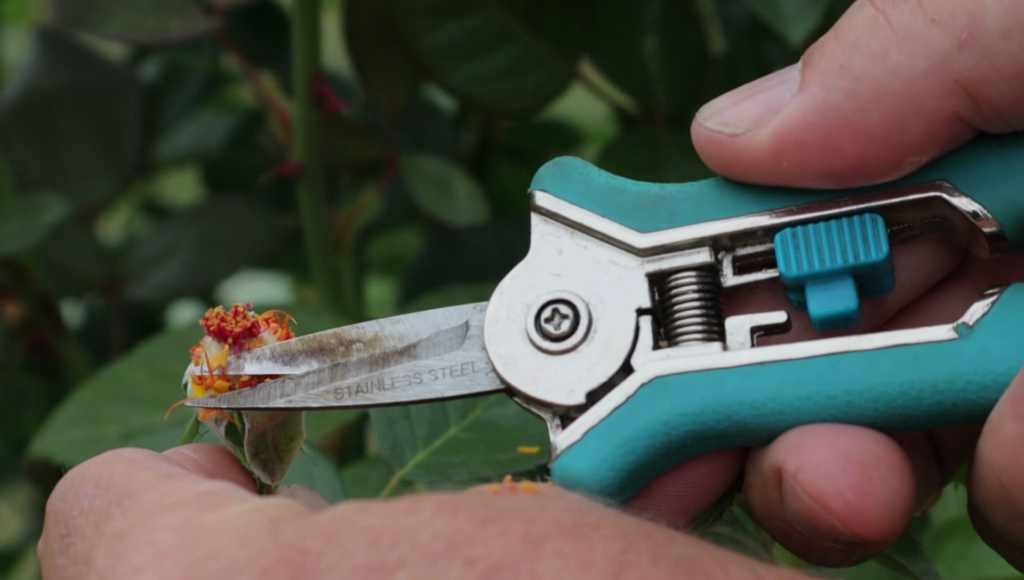
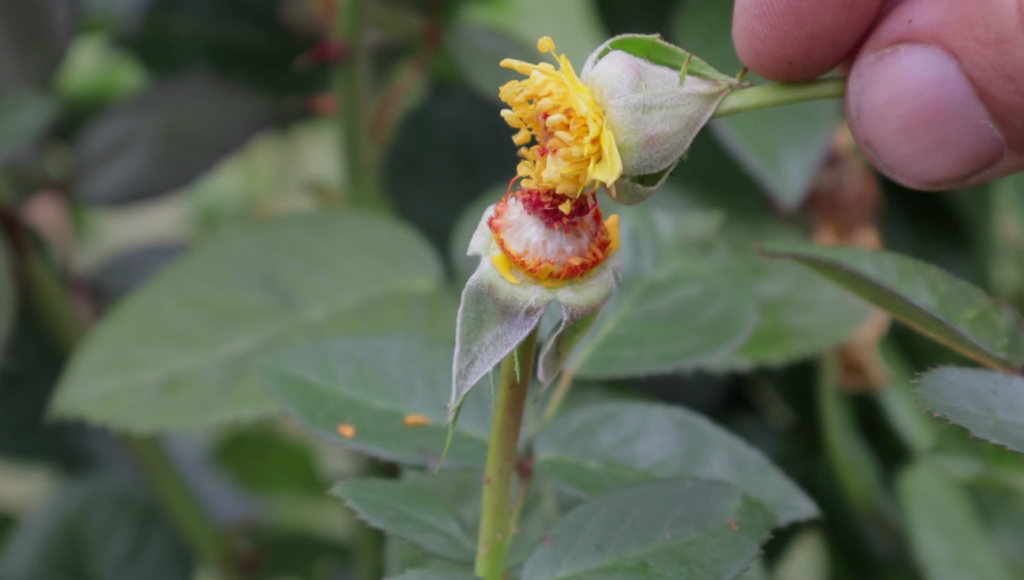
- Remove petals and stamens: Peel away both the petals and the stamens to leave only the pistil exposed.
At this stage, the pistil might not be ready to accept pollen yet. Signs of readiness include a slightly sticky or shiny appearance of the stigma, which may occur within a few hours to a couple of days after preparation.
Step 3: Transfer the Pollen
Timing: Afternoon of Day 1, repeated for 2–3 days
This part is straightforward:
- Use the prepared flower (pollen parent) like a brush to transfer pollen onto the exposed pistil of the seed parent.
- Repeat this process over the next few days to ensure pollination occurs when the pistil is most receptive.
For added accuracy, label the cross with the names of both parents. A simple plastic tag works well to track your work.
Step 4: Collect and Plant the Seeds
Timing: Around 3 months later
Over the next season, a rose’s fruit—called a hip—will form and ripen. Most hips turn orange or red when the seeds are ready to harvest. Here’s how to handle them:
- Harvest the hips: Cut them from the plant once fully ripe.
- Stratify the seeds: Roses need a cold, moist period (called stratification) before germinating. You can mimic winter by:
- Placing seeds in a tray of soil outdoors for the winter.
- Keeping seeds in a plastic bag with damp perlite or sand in the refrigerator for about three months.
Stratified seeds may start germinating early, so check regularly.
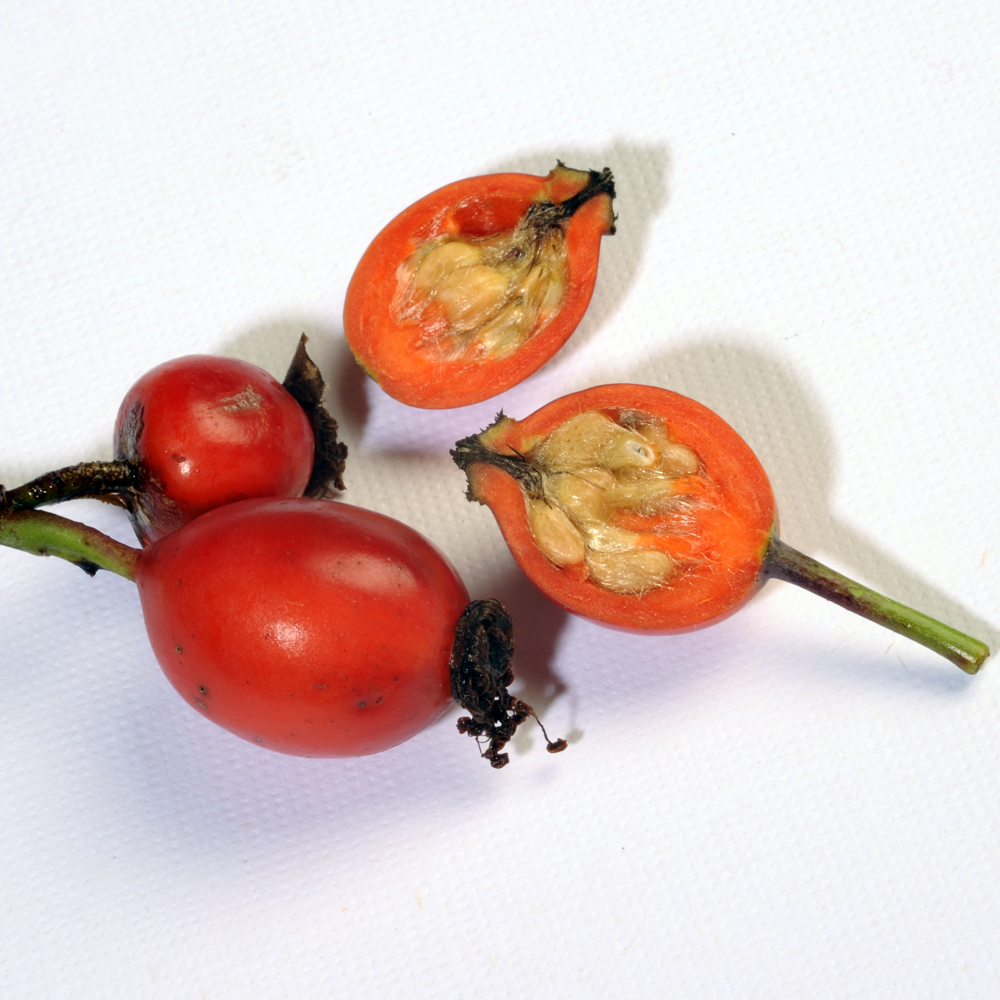
Plant your seeds in a seedling tray and wait for nature to take its course. Germination can be unpredictable—some seeds may not sprout, while others can surprise you with strong growth. Here’s a link to my video on growing roses from seed if you want more details.
What to Expect from the Seedlings
Don’t expect immediate results. Roses can take time to show their best traits:
- Germination: Takes weeks to months after stratification.
- First blooms: May appear in the first year but are often small or lack the mature form.
- Genetics: Seedlings often differ from their parents. Even self-fertilized roses can look quite different!
This unpredictability is part of the excitement. Breeders often grow thousands of seedlings to find a few exceptional roses. As a hobbyist, you might discover something remarkable on your very first try—or after years of experimenting.
If you’re curious about which rose varieties are most compatible for breeding, check out the Rose Hybridizers Association for in-depth advice on parent selection and rose genetics.
Final Thoughts
Hybridizing roses is a journey of patience, curiosity, and creativity. Some of the most famous rose breeders in history started with just one cross-pollination—and so can you. So grab your pruners, pick your parents, and start creating your dream rose. Who knows? Your garden’s next star might be waiting to bloom.


